
The Short Answer: How Long a Bathroom Remodel Takes in Dallas
If you’re skimming, here’s the nutshell: a typical full bathroom in the Dallas area usually runs about 3–6 weeks of on-site work once materials are ready and permits (if needed) are cleared. A powder room can be turned around in 1–2 weeks, while a gut-and-relocate (moving plumbing/electrical, re-framing, layout changes) can run 6–10+ weeks depending on inspections, scope, and lead times.
Why the spread? Three variables dominate in DFW:
- Scope (cosmetic refresh vs. layout changes),
- Permits/inspections (interior remodels may be simple; structural or layout changes add steps), and
- Material availability (DFW has great suppliers, but specialty tile/vanities can introduce delays).
We’re a Dallas-based team, so this guide is built around realistic local sequencing, buffers for inspections, and the small things like grout cure times or shower-glass lead times that often get overlooked.
What Changes the Timeline in DFW (Permits, Scope, Lead Times)
Permits & inspections
- Cosmetic refresh (no layout changes): Often no building permit is required, but trade permits (plumbing/electrical/HVAC) can still apply. Always verify based on your address and scope.
- Layout/structural changes: Expect drawings, submittals, and inspection checkpoints (rough-in and final). Build a buffer of several business days for scheduling and sign-offs.
- Condos/HOAs: Add time for board approvals, elevator reservations, work-hour rules, and protection requirements.
Scope real-talk
- Cosmetic: Keep the same layout; swap finishes/fixtures.
- Standard full: New tub or shower system, tile, vanity, lighting, and ventilation; minor framing at most.
- Gut-and-relocate: Demolition to studs, waterproofing system, plumbing/electrical re-routes, reframing, inspections, custom glass/vanity.
Material lead times we see often
- Custom glass: 1–3 weeks after final measure.
- Specialty tile & stone: In-stock = fast; imports/stone slabs can add 1–4+ weeks.
- Vanities & tops: Stock vanities are quick; custom cabinetry and tops can add 2–5 weeks depending on shop workload.
- Fixtures & valves: Most are quick, but certain finish colors (brushed gold, matte black) can be back-ordered.
Two Ways to Plan: By Scope and Week-by-Week
We recommend planning both ways:
- By scope to set expectations (1–2 weeks powder room, 3–6 weeks standard, 6–10+ weeks major).
- Week-by-week to manage trades, inspections, and dependencies.
- Vanities & tops: Stock vanities are quick; custom cabinetry and tops can add 2–5 weeks depending on shop workload.
Pair these with a pre-construction checklist (next section) so you start only when the job is truly “shovel-ready.”
The Week-by-Week Schedule (Dallas Edition)
Assumes selections are finalized, materials are on site or guaranteed, and any required permits are in hand. We add buffers where inspections or curing are likely.
Week 0 Design Lock & Pre-Construction (off-site but essential)
- Finalize layout, elevations, and selections (tile, trim profiles, vanity, tops, fixtures, lighting, fans, mirrors, hardware, glass).
- Order long-lead items; confirm ETAs and substitutions.
- Verify permit/trade requirements by jurisdiction (Dallas city limits vs. suburbs can differ).
- Schedule start date, secure trash container, dust control plan, floor protection route, pet/kid plan.
- Create a job binder (drawings, specs, order receipts, contacts, inspection notes).
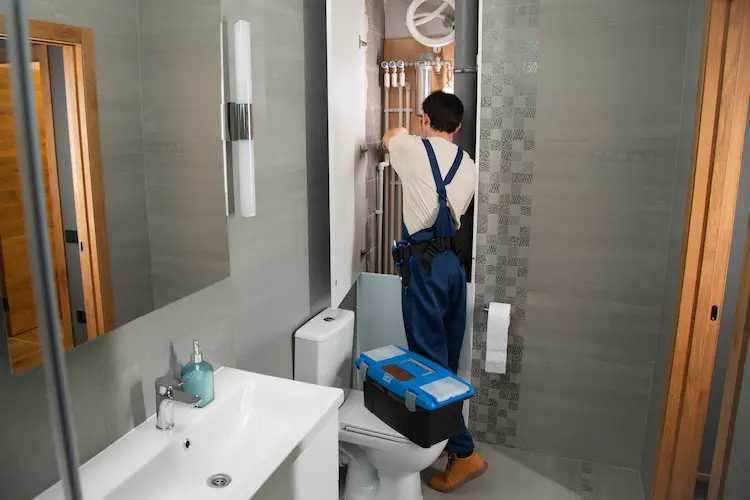
Week 1 Demo, Rough Layout, and First Rough-ins
- Protection & demolition; cap lines; identify surprises (rot, prior DIY).
- Framing tweaks (niches, curbs, pony walls).
- Rough plumbing & electrical: set valve depths, drain locations, dedicated GFCI, fan ducting.
- Inspection window (if required): schedule rough-in.
Week 2 Substrate & Waterproofing
- Subfloor repair/leveling; shower pan or system installation (e.g., pre-slope/liner or foam tray).
- Backer board & waterproofing (membrane, seams, flood test where required).
- Drywall/float in dry areas; prime ceilings/walls.
- If inspections apply (waterproofing/flood test), buffer 1–2 days.
Week 3 Tile Setting
- Walls first, then floors; respect cure times and movement joints.
- Trim details (miters/schluter) for clean edges.
- Grouting & sealing (if applicable).
Week 4 Fixtures, Cabinetry, Paint
- Set tub/shower trim, install toilet, vanity, faucet, lighting, fan.
- Cabinetry & tops: If tops are template-and-fabricate, allow extra days; if pre-made, install now.
- Prime & paint walls/ceilings; caulking for clean transitions.
Week 5 Glass, Mirrors, Accessories & Punch
- Custom glass: measure after tile typically arrives in 1–3 weeks; if it’s in, install now.
- Mirrors & accessories (towel bars, TP holder, hooks).
- Final electrical & plumbing trims; final cleaning; punch list walk-through.
Week 6 (if needed) Closeout
- Outstanding items (often glass or a special-order mirror).
- Final inspection (if required).
- Warranty handoff and care guide.
Timeline by Scope: Powder Room, Standard Full, and Gut-and-Relocate
Powder Room: 1–2 weeks
- No wet area re-build; primarily toilet/vanity, lighting, paint, flooring.
- Watch-outs: lead time for vanity top, floor prep under LVT/tile, and mirror/lighting height.
Standard Full Bathroom: 3–6 weeks
- New tub or shower system, full tile, vanity, lighting, ventilation, paint.
- Watch-outs: waterproofing cure, tile layout planning, and glass lead time.
Gut-and-Relocate (layout/structural changes): 6–10+ weeks
- Reframing, moving drains/vents, subpanel circuits, inspections.
- Watch-outs: inspection calendars, custom cabinetry/tops, change-order control.
Pro tip: If your home has only one shower, consider stock-size glass (faster) or a temporary curtain until custom glass arrives, so you’re not without a working shower.
If You Only Have One Bathroom: Survival Plan Without Moving Out
- Temporary setups: Keep a working toilet daily (swap at end of day), and stage a temporary shower if possible (e.g., use a secondary location or gym membership during glass wait).
- Noise & dust: Request zip walls, negative air (fan to exterior), and daily clean-downs.
- Schedule transparency: Ask for a daily log with tomorrow’s tasks so you can plan routines.
- Kids & pets: Gate work areas; plan quiet times for naps; confirm any VOC-heavy tasks are ventilated.
How to Speed Things Up (Without Cutting Corners)
- Selections first, orders second: Do not start demo until long-lead items have confirmed ship dates.
- Permit-ready drawings: Even if simple, clean diagrams reduce back-and-forth.
- Stock where it matters: Choose in-stock tile/fixtures and standard-size glass when speed matters.
- Batch inspections: Where allowed, group rough-in checks to reduce waiting days.
- Decision discipline: Freeze layout before demo; late changes are the #1 delay multiplier.
- Contingency: Hold a 10–15% time buffer for surprises (subfloor rot, shifted joists, hidden lines).
Common Delays in Dallas and How We Prevent Them
- Late material arrivals → We confirm substitutions (same look, faster ship) and stage materials before start.
- Valve depth/setbacks off by ⅛–¼” → Our crew dry-fits trim before closing walls.
- Failed waterproofing due to rushed cure → We schedule cure days into the calendar, not over the weekend by accident.
- Inspection timing → We pre-coordinate inspection windows and keep as-builts/photos handy.
- Change orders after tile starts → We lock tile layout drawings (niche heights, pattern, transitions) upfront.
Pricing & Time: Why Faster Isn’t Always Cheaper
Cutting a week by skipping cure time, squeezing trades, or installing before glass arrives often raises risk (rework, leaks, callbacks). The most cost-effective remodels in Dallas follow a steady rhythm: protect → demo → rough-in → inspect → waterproof → tile → trim → glass → punch. Paying for that rhythm qualified trades, sequencing, and quality control costs less than emergency fixes or re-tiling after a leak.
When We’re a Fit (Service Area, Expectations, and How to Start)
We’re a Dallas-area remodeler focused on clean sequencing, friendly communication, and durable details. If you value a clear timeline with honest buffers, we’re likely a fit.
How to get your tailored timeline:
- Share address + scope (cosmetic vs. layout changes).
- Send inspiration photos and any HOA notes.
- We’ll confirm permit needs, validate lead times, and give you a scope-based schedule with start/finish windows.
FAQs
Most standard full bathrooms land around 3–6 weeks of on-site work when materials are ready and no major layout changes are involved.
Often yes. Interior cosmetic work may not need a building permit, but moving drains/vents or structural changes typically involves trade permits and inspections. We’ll advise once we see your scope.
Lead times (glass, specialty tile/vanity) and late changes. We control both with early selections and confirmed ETAs before demo.
A powder room or light cosmetic project can. Full bathrooms under 2 weeks are rare unless the scope is minimal and everything is in stock.
Dallas allows year-round work. The main factor is supplier and trade availability we schedule to avoid holidays and ensure inspections line up.
Conclusions
A bathroom remodel that hits its dates isn’t luck it’s scope clarity, pre-ordering, and disciplined sequencing. Plan your Dallas project with a scope-based range and a week-by-week schedule like the one above, and you’ll avoid the classic pitfalls that turn weeks into months. When you’re ready, we’ll translate this template into a custom timeline for your home and jurisdiction.